Check out the tips below to help you create your universe today:
Universe Image Creator (UIC) allows you to create images of outer space. You create a “scene” which is made up of 3D Objects such as nebula and planets that you place and configure in the scene. You can save differing views of the scene to images.
Scene Creation
- Select a tool from the Tool Dropdown.
- Click on the window and a new object will be added to the scene using the current tool properties. The object will be centered where you clicked. The newly created object is currently selected as shown by the red outline.
- You can change your viewpoint by clicking in the scene window and using the mouse or arrow keys to adjust the view.
- The Field of View (FOV) can be changed using the F6 key. Hitting F6 will increase the FOV by 6° in the range from 30°to 90°. Larger FOV values will increase the distortion as you move away from the center of the viewport. Scenes and Images you save use the current FOV setting.
Editing Objects
Object Properties
- You can change the properties of the object using the Properties area.
- You can give the object a friendly name using the Name field.
- Click on the Orientation button to change the orientation of the object. You must click the Orientation button again to exit the orientation mode.
- Click on the Location button to change the location of the object. Click and the object will be centered at the clicked point. You must click the Location button again to exit the location mode.
- Use the Distance slider to move the object relative to the viewpoint.
- Use the Randomize button to translate the grid used by the noise functions and get an entirely different look. The translation will be saved as part of the object so the look will be reproduced when loading an object.
- Planets and Planetoids will show additional controls for lighting. There is a SINGLE directional light source in the scene and you can use this to control the direction and color of the light for all objects in the scene.
Selecting Objects
If you want to edit a previously created object you can select it by clicking on it or if you have overlapping objects select it from the Objects dropdown.
Scene Management
- Use the File menu to start a new scene, open an existing scene, or save the current scene.
- Use Save Image to render the scene to a JPEG or PNG image.
- The Demo action will render a sequence of example scenes and optionally allows you to save an image of each scene.
Options
- Use the Options dialog to control shadows and post-processing performed in the scene.
- Shadows are an expensive operation that is turned off by default. They are only needed when using Planets, Planetoids, and Rings. The quality of the shadows varies between graphics cards and you may need to experiment to find a generator that works well.
- Post-processing options allow you to control the antialiasing and Blur effects performed on the scene.
Graphic Support
Universe Image Creator (UIC) is dependent on your graphics card to render scenes. Most issues when running are going to be related to the capabilities of your graphics card. Performance, especially on laptops, will lag on scenes with many objects. There may also be visual artifacts on some cards. You can run the demo scenes from the File menu and compare it with reference scenes.
WebGL
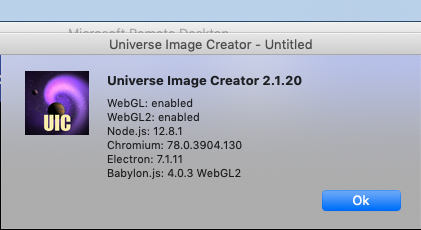
Universe Image Creator (UIC) uses WebGL to control your graphics card. This WebGL support is provided by Electron which ships with Chromium, the open-source project that is the basis for Google Chrome. You can test if your system supports WebGL here and WebGL2 here. Passing these tests should indicate your graphics card is sufficient to run UIC. However, they do not guarantee WebGL is working in Chromium. When running UIC you can check the About Box (Windows) or the Versions Box (Mac OS X) under the Help menu. It displays the WebGL status of Chromium:

